
A connector for ecommerce shippers and a long list of small floor wins
Odoo 20 does not rebuild Inventory. It adds a ShipStation delivery connector, teaches the Barcode app to read RFID bursts, and removes taps from the operations a picker repeats all day: generating serial numbers, loading a package on reception, opening a supplier's pending transfers by scanning their badge. If you run a warehouse or the fulfilment side of an online store, these are the changes that touch your team's hands, and this post walks through each of them on the pre-release build.
We cover the ShipStation module, the RFID and scanner settings, on-the-fly serial generation, the Barcode App tab on operation types with its Instructions Preview, the contact scan from the main menu, and the smaller bridges for CMR printing, Barcode Lookup and Intrastat.
Observed on the Odoo 20.0 Enterprise pre-release build of September 23, 2026. Names, menus and availability can change before general availability; we will update this page when they do.
A native ShipStation delivery method for North American shippers
The headline connector is a new module, delivery_shipstation. Once installed, ShipStation appears as a provider on the delivery method form, next to the fixed-price and rule-based methods you already know. According to the 20.0 source, the method carries an API key, a default package type, carrier and service codes, a label layout and file type, an insurance provider, a delivery confirmation type, and flags for multi-package and return shipments. The setup text in Odoo explains how to enable carriers in ShipStation and mirror them in Odoo. Labels bought through ShipStation are attached to the transfer with their reference, and a package type can carry a ShipStation carrier code.
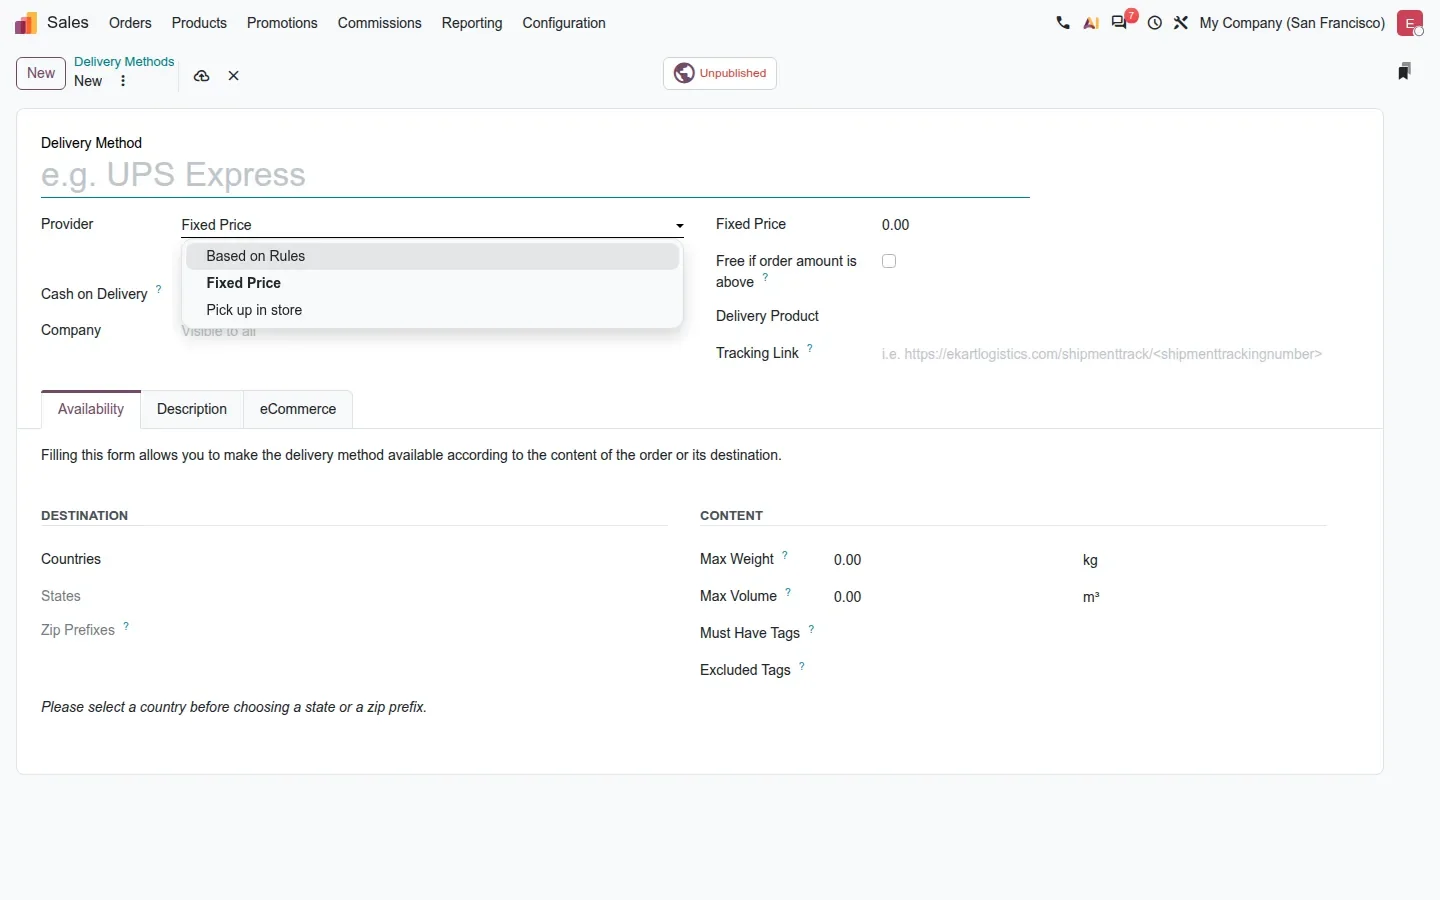
Why it matters: many ecommerce merchants in the US and Canada already consolidate UPS, USPS, FedEx and regional carriers inside ShipStation, then pay for a custom bridge to get labels back into Odoo. A standard connector replaces that bridge and is maintained by Odoo across versions. We did not install the module on our demo, so the screenshot shows the provider list without ShipStation; the fields listed here come from the source, not from a screen we clicked.
RFID bursts, aggregate barcodes and scanner timing
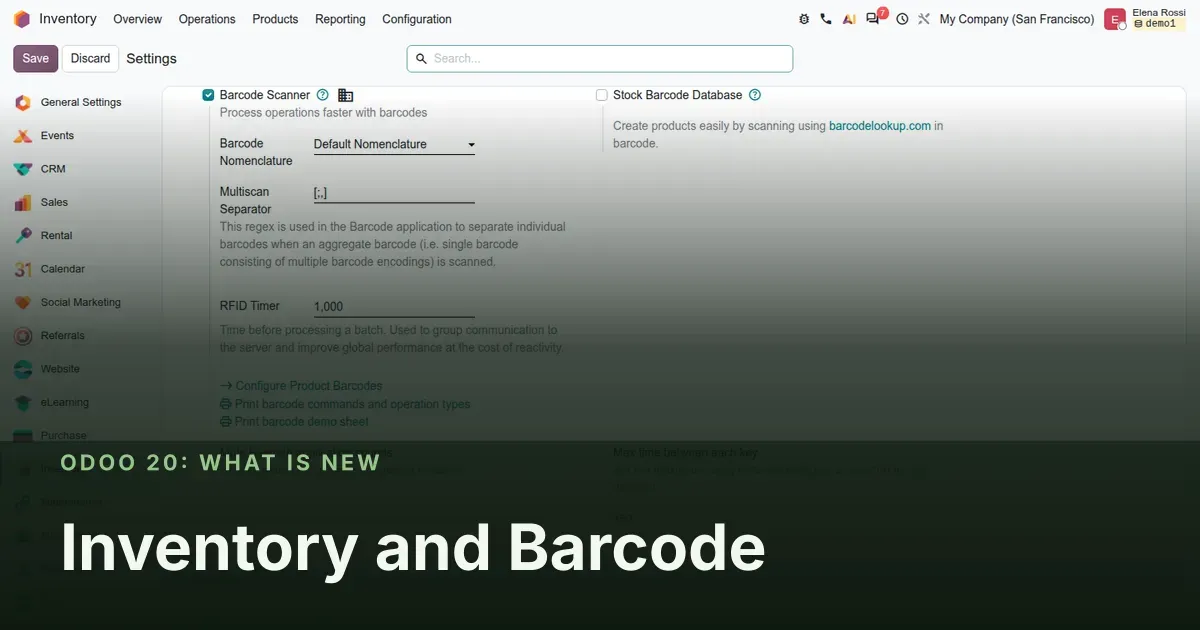
The Barcode app now understands RFID readers that send hexadecimal values. A reader does not emit one tag at a time; a single pass of the gun over a pallet returns dozens of tags in a burst. The new RFID Timer setting holds that burst for a set number of milliseconds and processes it as one batch, so the app registers all the items together instead of redrawing the screen for each one. On the demo it is set to 1,000 ms; the help text says you trade a little reactivity for stable performance.
![Settings page with Barcode Scanner enabled, Multiscan Separator "[;,]", RFID Timer 1,000 and Max time between each key 150.](/_ipx/f_webp&q_85&s_1440x900/images/blog/odoo-20-inventory-barcode-settings-barcode-rfid-multiscan.webp)
Two neighbouring fields tune ordinary scanners. Multiscan Separator is a regular expression, [;,] by default, that splits an aggregate barcode, one label that encodes several barcodes, into its parts. Max time between each key sets how many milliseconds may pass between two keystrokes before the app decides a wedge scanner has finished sending; the default is 100 ms and the demo uses 150, which suits older rugged devices. All three fields live in Inventory > Configuration > Settings, in the Barcode Scanner block, and all three are visible in developer mode only. The guide lists them as ordinary settings; on the real build you must activate developer mode first.
Generate serial and lot numbers from the handheld, one or all at once
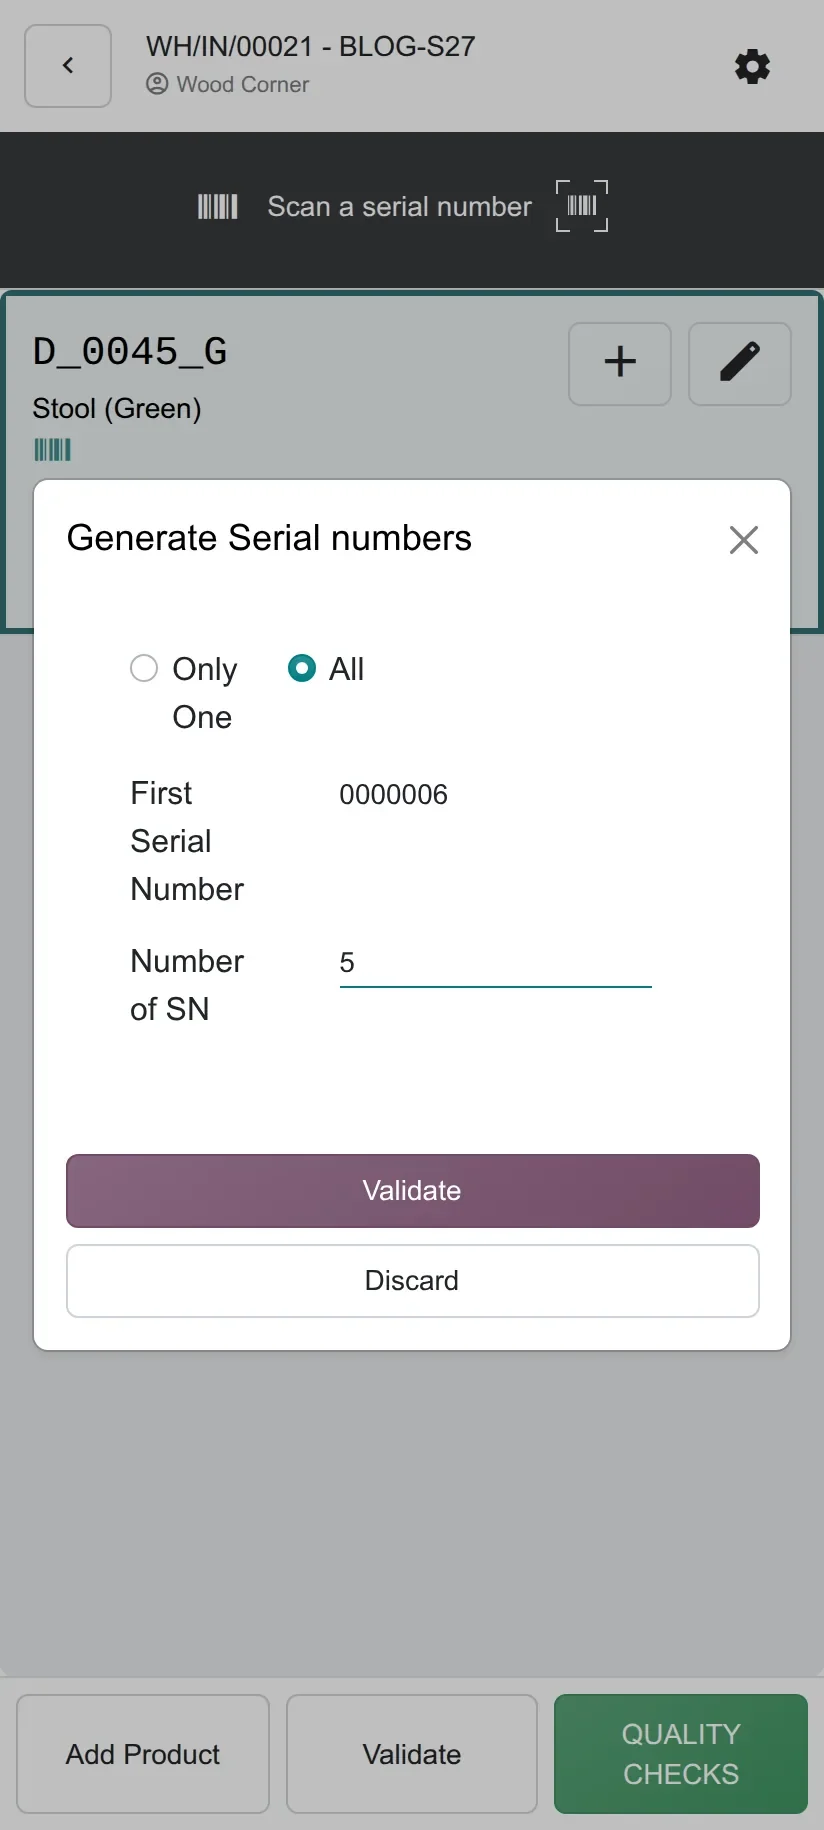
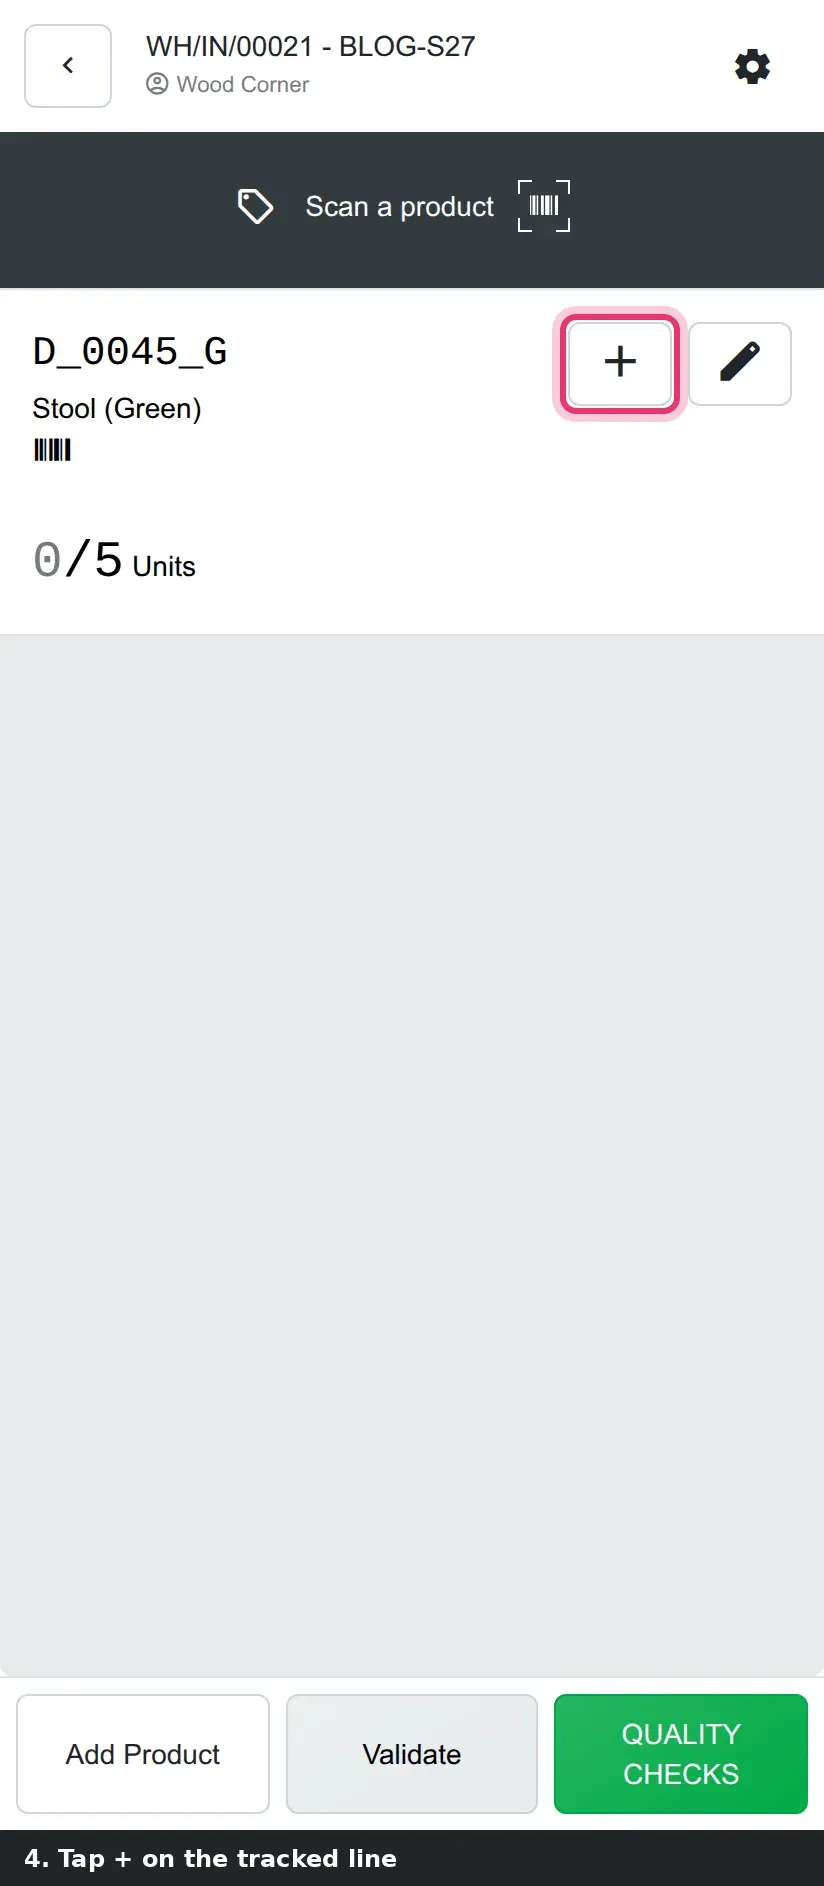
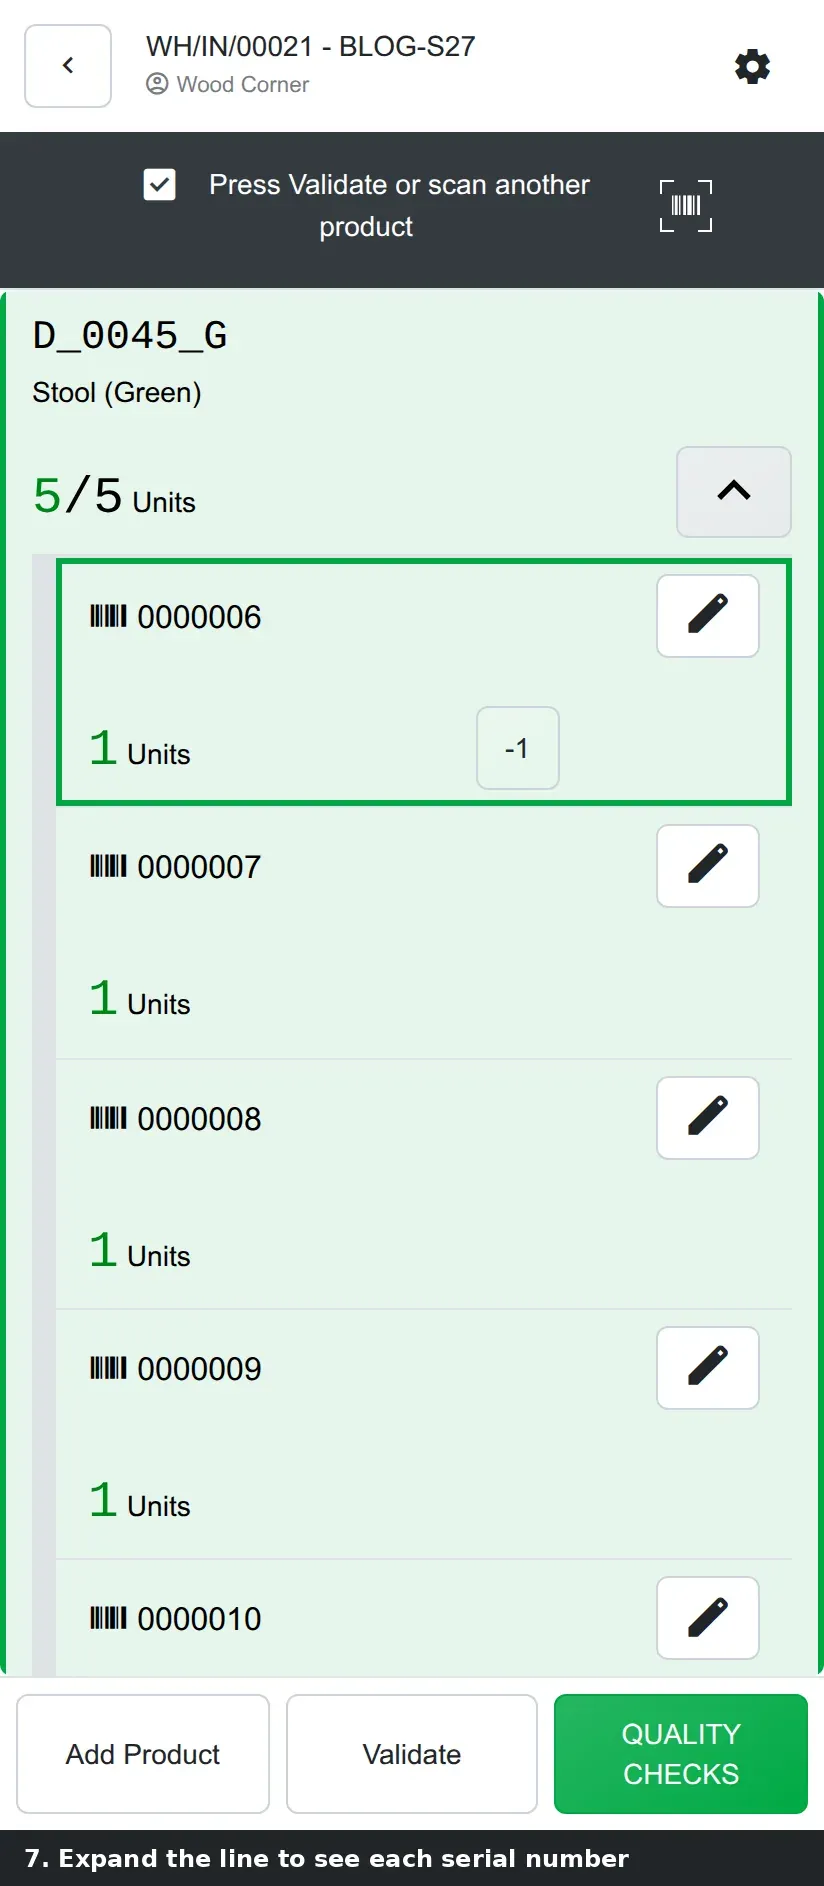
Receiving five serial-tracked stools used to mean five scans or five typed numbers. In Odoo 20 the receipt line in the Barcode app has a + button that opens a Generate Serial numbers dialog. It offers two modes: Only One, which creates a single number for the unit you are holding, and All, which creates one number per remaining unit in a run. You set the First Serial Number, the app shows the Number of SN it will create, and Validate fills the line. On our receipt of 5 x Stool (Green) from Wood Corner, mode All produced serials 0000006 to 0000010 and the line turned green at 5/5.
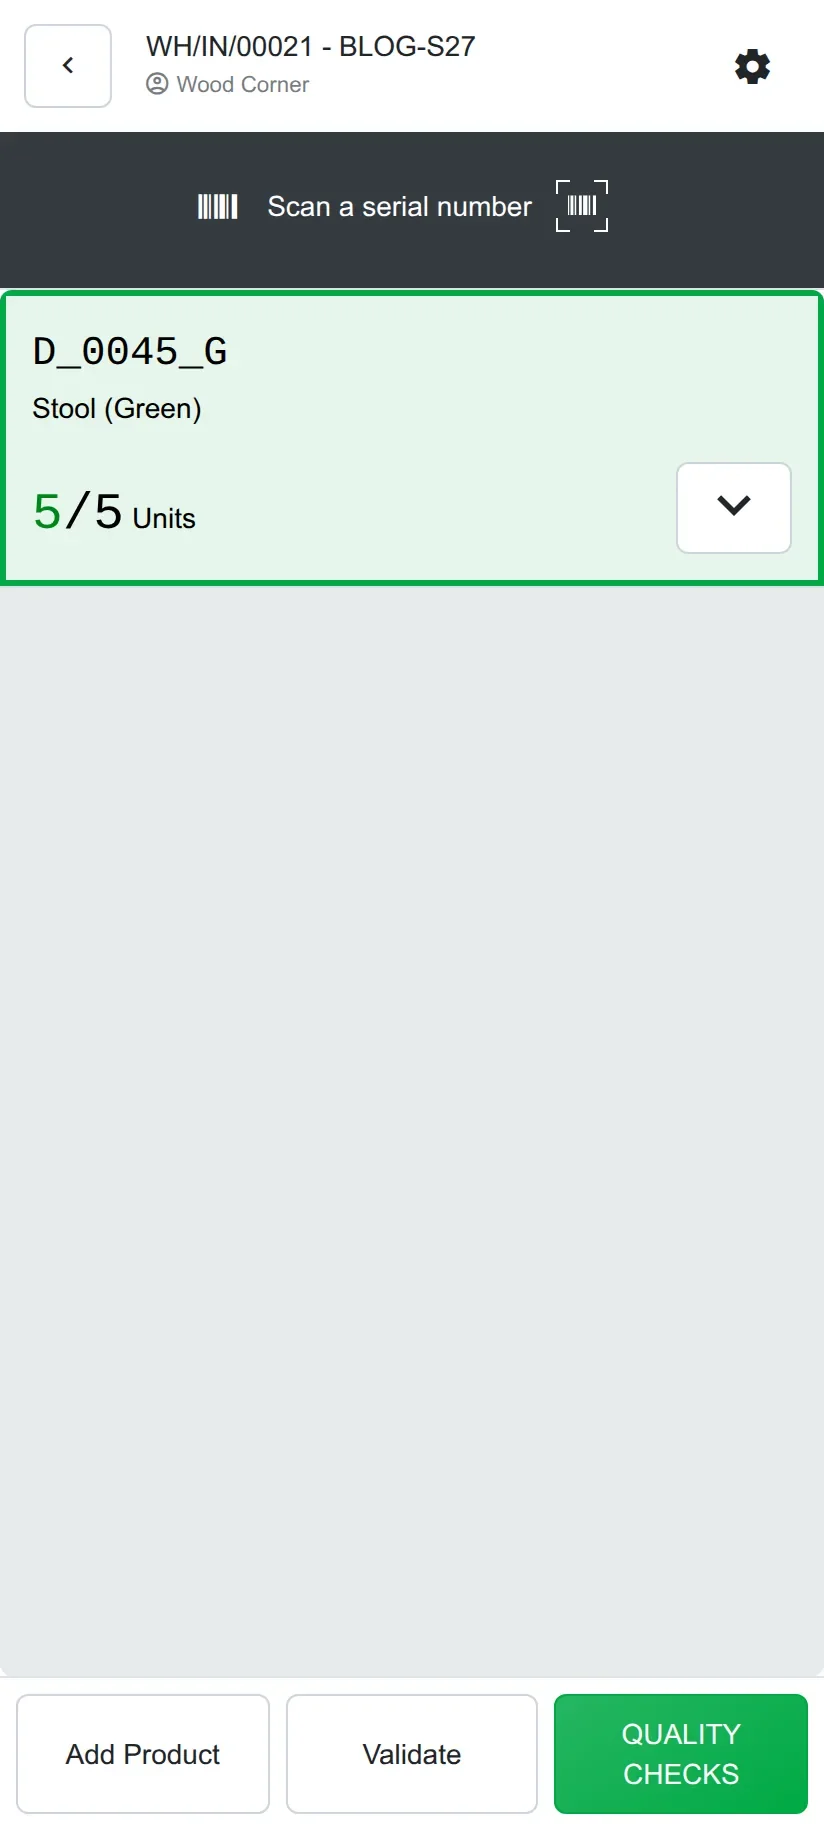
Expanding the line shows one sub-line per serial, 1 unit each, so the operator can still edit or remove a number before validating the receipt. One correction to the guide: it describes a Generation Mode field on the operation type form. On the pre-release build there is no such field; the Only One / All choice lives in the dialog itself and the app remembers your last choice per operation type. Lot-tracked products work the same way.
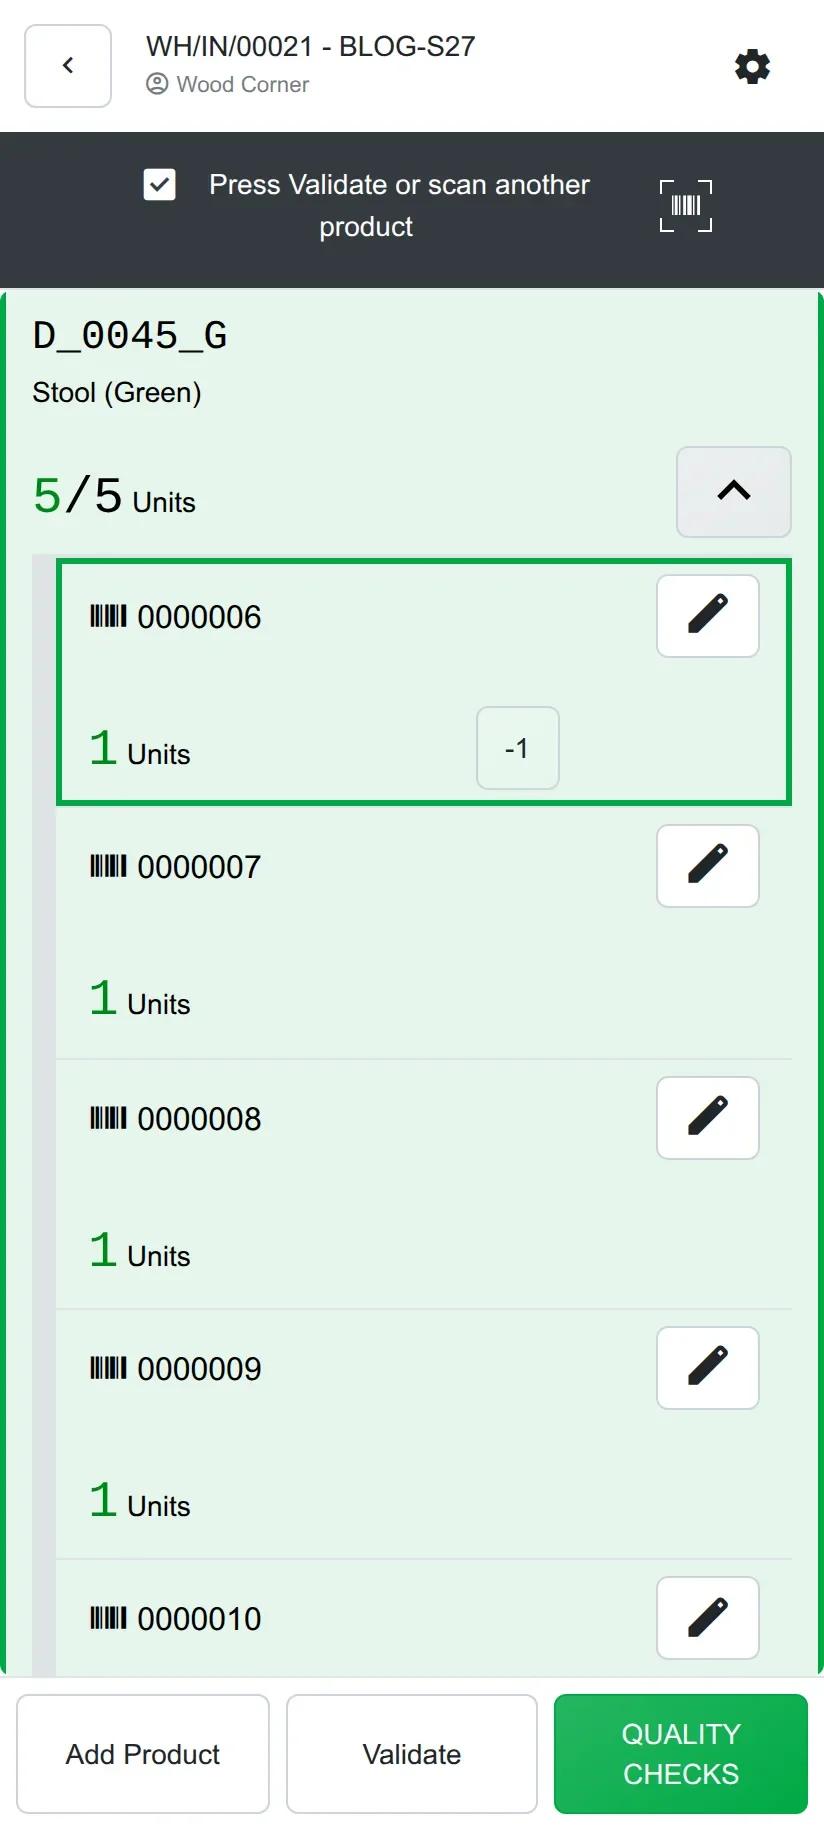
Set the first number on purpose
The dialog proposes the next free number in Odoo's sequence. If your supplier ships units with their own serial labels, type the first supplier serial into First Serial Number and use mode All only when their numbers are consecutive; otherwise scan them one by one so the numbers on the box match the numbers in Odoo.
A Barcode App tab per operation type, with an Instructions Preview
Open Inventory > Configuration > Operation Types > Receipts and the form has a Barcode App tab. It groups the settings that shape the handheld flow for that operation: Show reserved lots/SN, a Mandatory Scan block where Product can be forced and Lot/Serial set to Optional Scan or required, an Options block with Allow extra products, and a Final Validation block with Allow full picking validation. Below them, the Instructions Preview renders the steps the operator will see when the operation starts. For Receipts on the demo it reads: scan a product (optional), scan a lot/serial number if the product is tracked, scan more lot/serial numbers (optional), validate or scan another product.
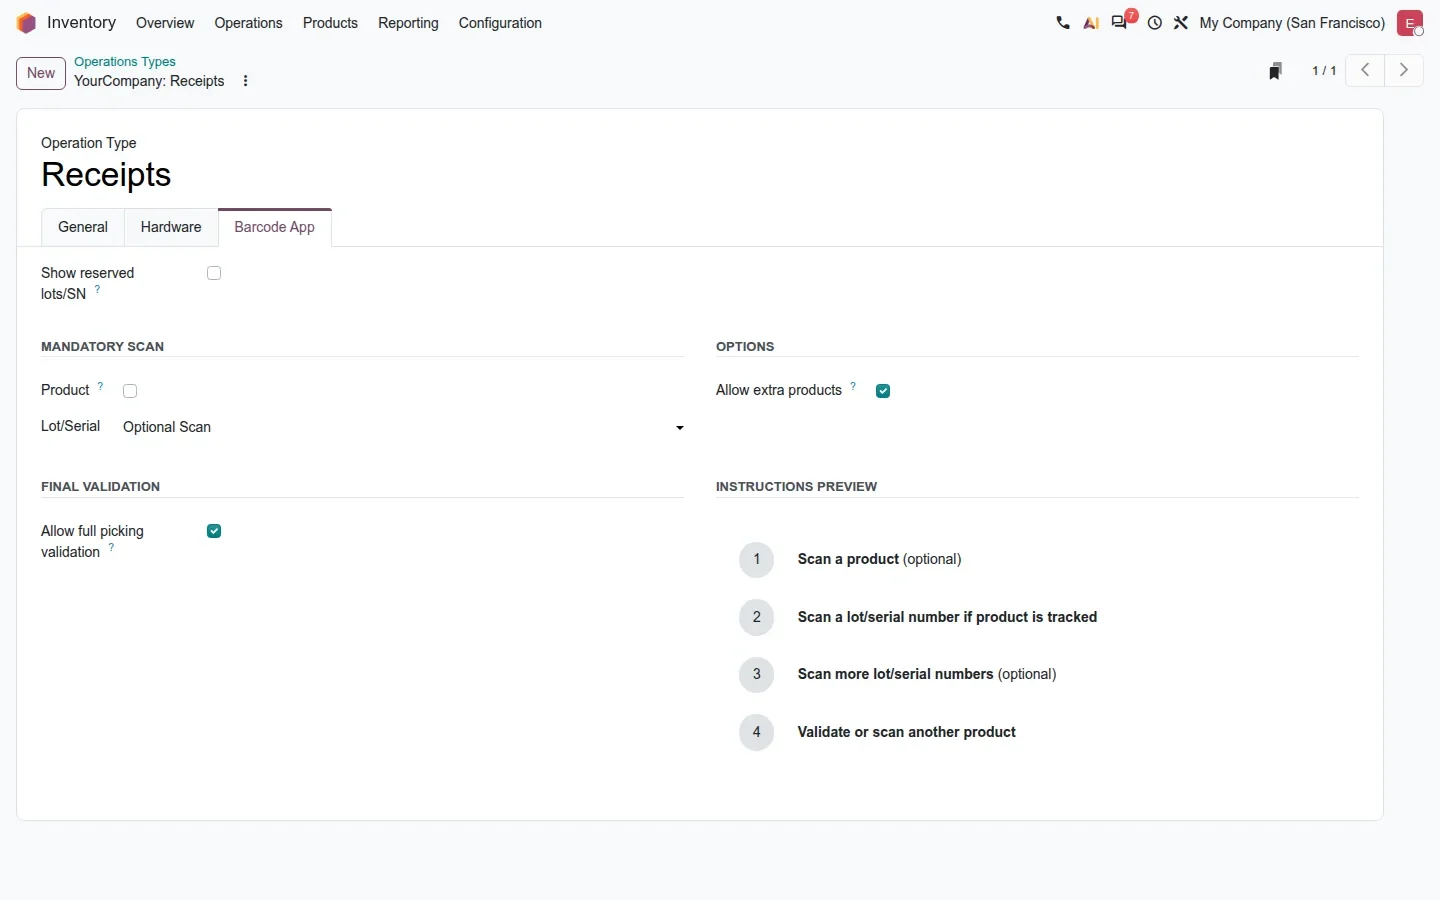
The preview updates as you tick options, so a warehouse manager sees what a mandatory product scan does to the flow before pushing it to the floor. The guide presents it as an HTML block a partner can fill with safety notes; on the pre-release build it is a computed preview of the scan sequence, not a free-text editor. Two other floor changes belong here. Put in Pack can auto-package from the product packaging so the operator stops picking a package type by hand; the Force put in pack option only appears once Packages is enabled, which we did not turn on. On receptions, scanning a package barcode loads its content onto the transfer, and the picking kanban shows the origin document, the order number a picker actually recognises.
Scan a contact to open their pending transfers, plus three bridges
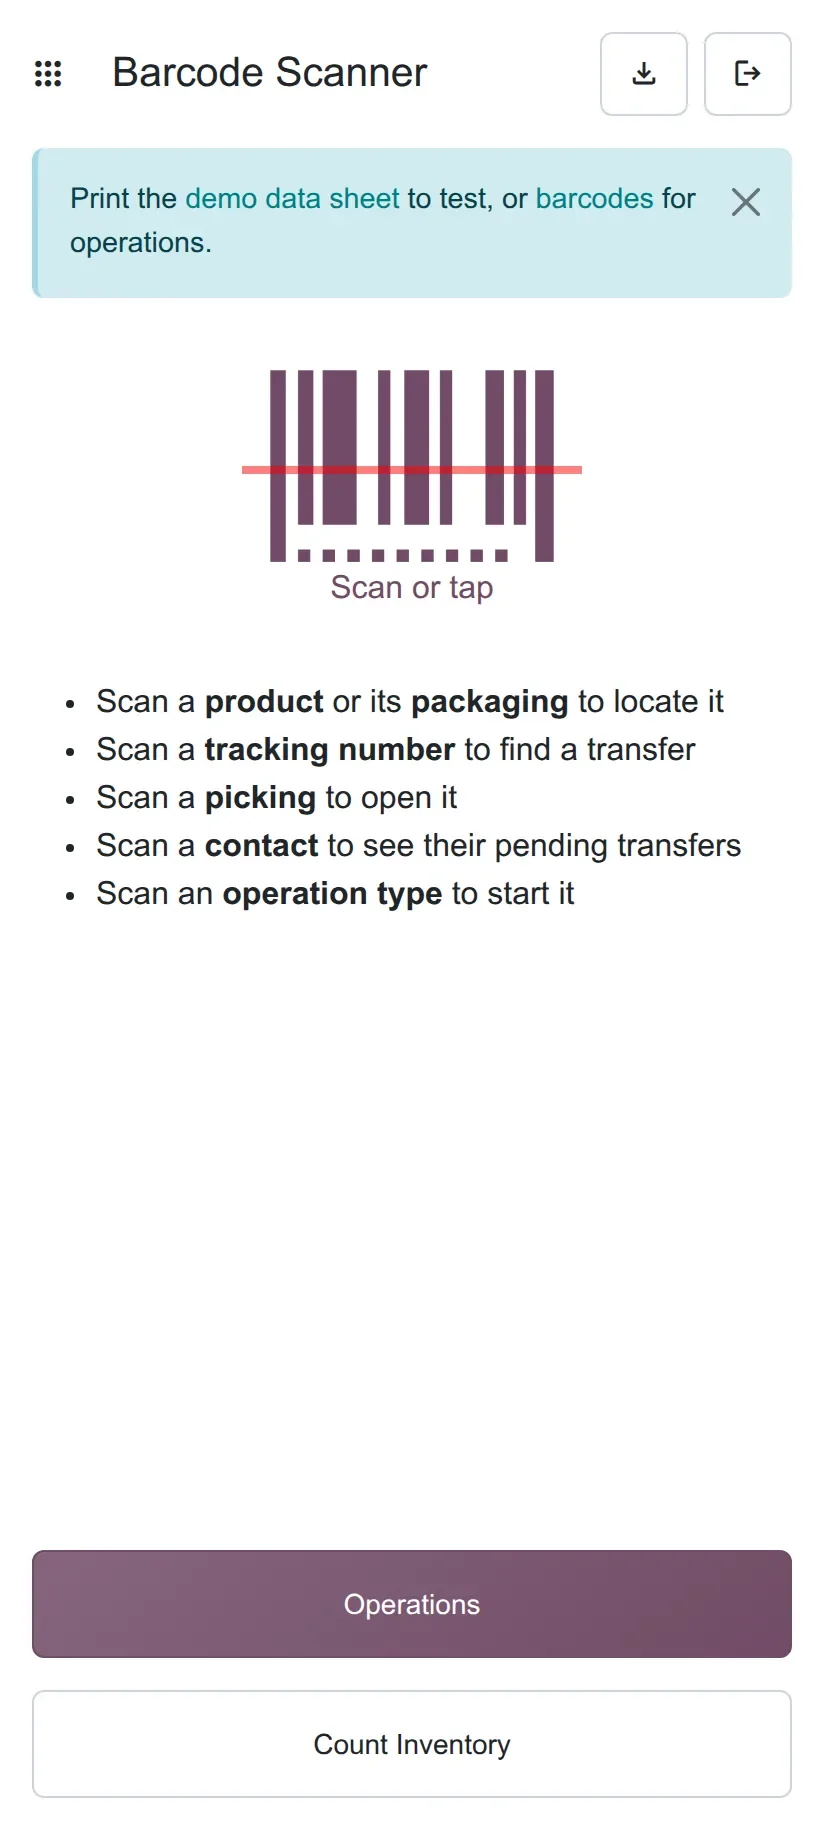
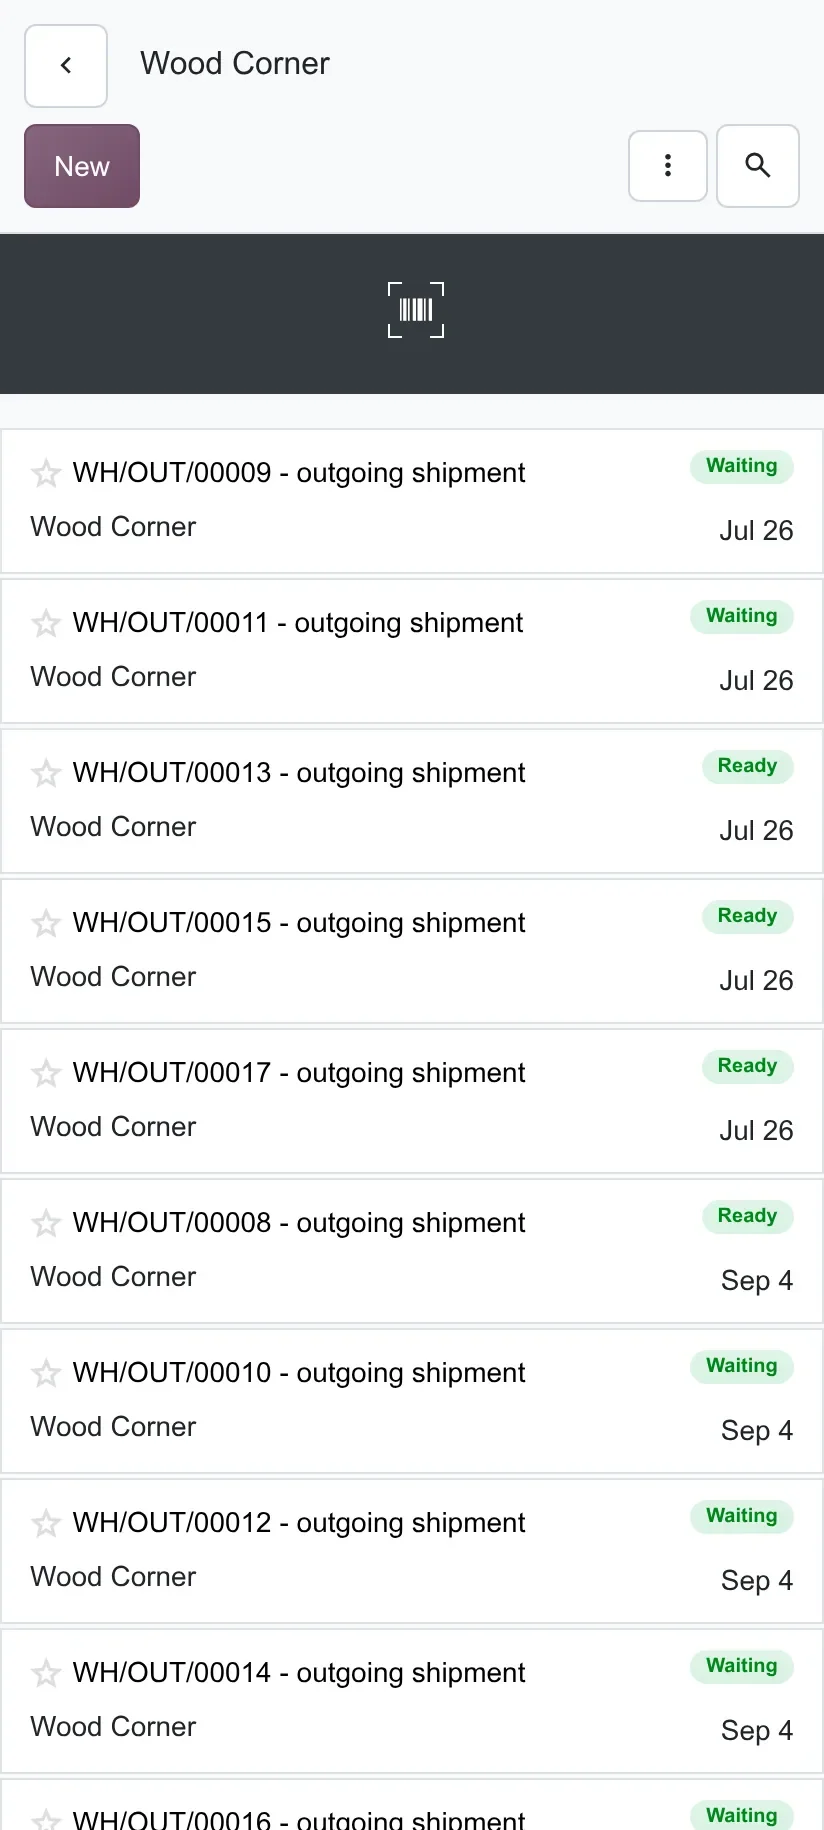
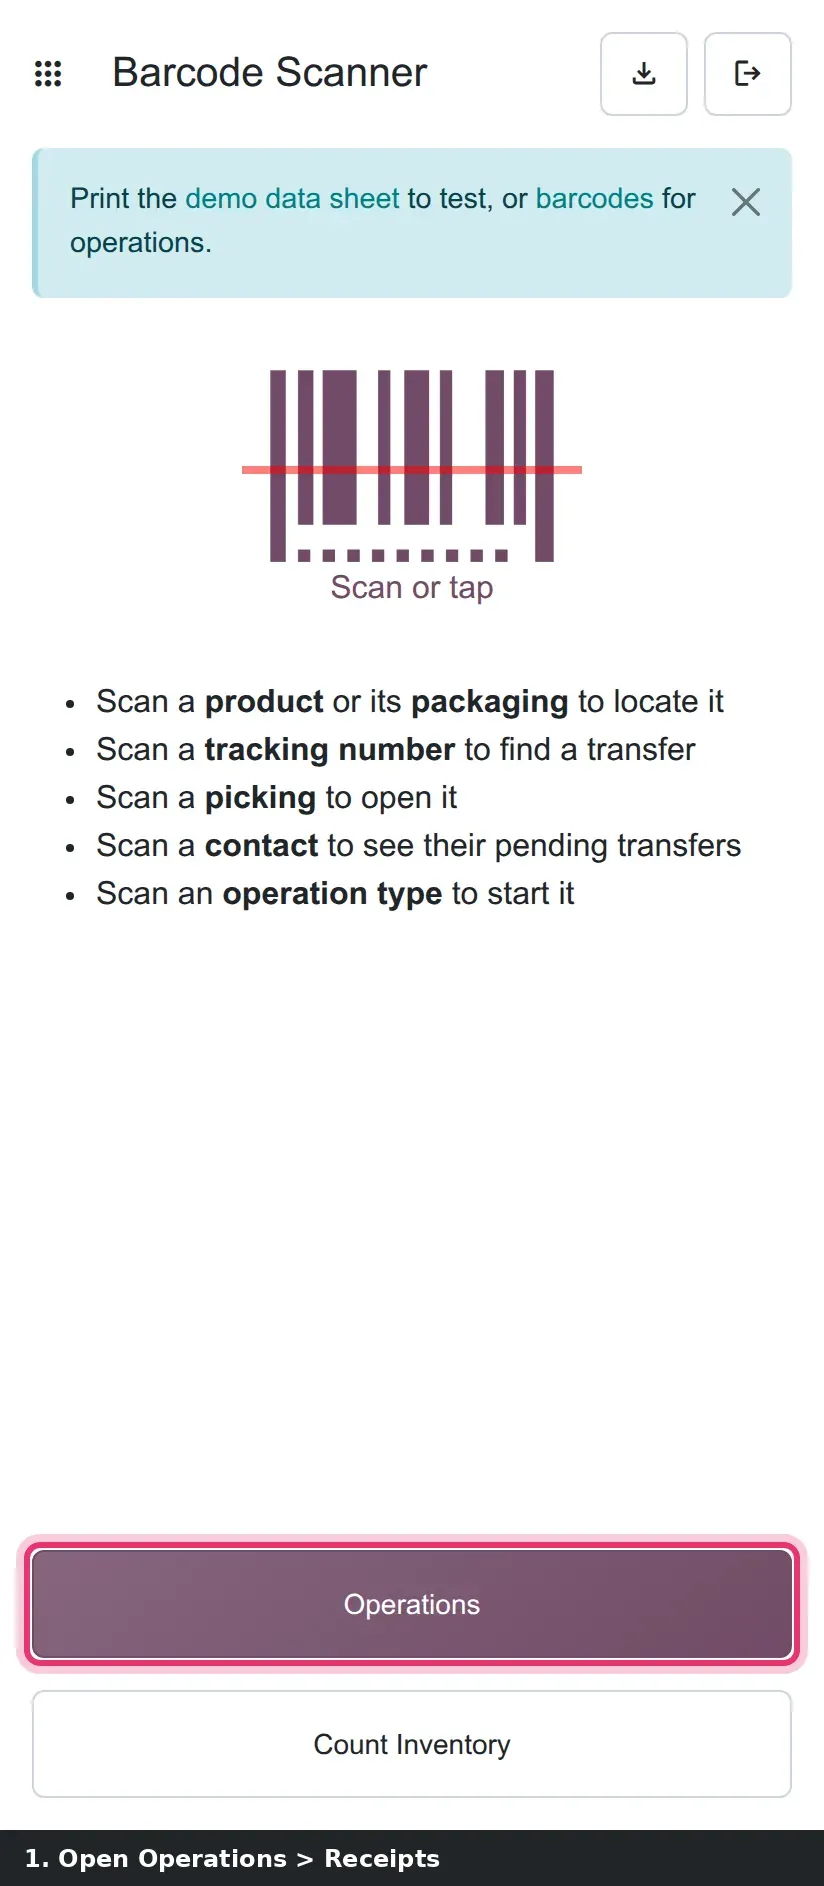
The Barcode main menu lists what a scan does from the home screen: a product or packaging locates it, a tracking number finds a transfer, a picking opens it, an operation type starts it, and, new in this build, a contact shows their pending transfers. We gave the contact Wood Corner the barcode WOODCORNER, scanned it from the main menu, and the app opened a kanban titled Wood Corner listing their outgoing shipments and receipts with their Waiting and Ready states. For a will-call counter or a supplier dock, one scan of the driver's badge shows every transfer for that partner.
Three bridges round out the release, none of which we installed. With Fleet and Barcode together, stock_barcode_fleet adds the CMR consignment note to the print menu of a transfer or a batch inside the Barcode app. stock_barcode_barcodelookup lets Barcode Lookup fill in expiry information when a product is created from an unknown barcode; it needs a barcodelookup.com API key. And a set of Intrastat bridges add PoS stock moves, purchase receipts and sales deliveries to the stock-based Intrastat report, with rental orders appearing once their duration crosses the reporting threshold. Our demo company is in the US, so there was no Intrastat report to open.
How to try it on a demo database
- Activate developer mode, then open Inventory > Configuration > Settings and find the Barcode Scanner block: Multiscan Separator, RFID Timer and Max time between each key.
- Open Inventory > Configuration > Operation Types > Receipts, click the Barcode App tab, tick Product under Mandatory Scan and watch the Instructions Preview change.
- Create a receipt of a serial-tracked product with a quantity of 5, then open the Barcode app, tap Operations > Receipts and open it.
- Tap + on the product line, choose All, keep the proposed First Serial Number and tap Validate. The line reads 5/5; expand it to see one sub-line per serial.
- Give a contact a barcode on their contact form and scan it from the Barcode main menu to open their pending transfers.
- To see ShipStation, install its module, then open Inventory > Configuration > Delivery Methods and create a method with provider ShipStation.
What we could not verify on the pre-release build
The ShipStation delivery method form: the module was not installed on our database, so the fields described above come from the 20.0 source. The CMR print from the Barcode app and the Barcode Lookup expiry fill: bridge modules not installed, and the second needs an API key. The RFID burst itself: no reader on hand, only the RFID Timer setting was captured. Put in Pack auto-packaging and package-content load on reception: they need Packages enabled and product packagings, which we did not set up. The Intrastat report with PoS and rental moves: our demo company is in the US and has no Intrastat report. Everything else on this page was clicked through on the 20.0 Enterprise build of 23 September 2026.
What this means for an upgrade
If you are on Odoo 17, 18 or 19 with a custom ShipStation bridge, list what it does today, labels, tracking, rates, returns, and compare it line by line with the standard module before you plan the cut-over. Barcode changes are low risk, but re-check your operation types after the upgrade, because the Barcode App tab exposes options that used to be hidden, and retrain pickers on the + button and the contact scan. If RFID readers, label printers, ShipStation or any other system talk to your Odoo over XML-RPC or JSON-RPC, book an RPC migration audit first, since Odoo has scheduled the removal of those endpoints for Odoo 20. We handle the rest as part of our migration service, and the series hub lists the other changes that touch the same upgrade.
Frequently asked questions
Does Odoo 20 have a native ShipStation integration?
Yes. A new delivery_shipstation module adds ShipStation as a delivery method provider with an API key, carrier and service codes, label layout and file type, insurance and confirmation options, and multi-package and return flags. Labels are stored on the transfer. We did not install it on our demo, so we describe it from the 20.0 source.
Can the Odoo 20 Barcode app work with RFID readers?
It reads RFID readers that send hexadecimal tag values, and an RFID Timer setting groups the burst of tags from one pass into a single batch. The setting is in Inventory > Configuration > Settings, visible in developer mode. We could not test an actual reader on the pre-release build.
How do you generate serial numbers in the Odoo 20 Barcode app?
Open the transfer in the Barcode app, tap + on a serial-tracked line, and a Generate Serial numbers dialog appears. Choose Only One for a single number or All for one number per remaining unit, set the First Serial Number and tap Validate. The app remembers the mode per operation type.
What does scanning a contact do in the Odoo 20 Barcode app?
From the Barcode main menu, scanning a contact's barcode opens a list of that contact's pending transfers, outgoing shipments and receipts, with their Waiting or Ready state. It suits will-call counters and supplier drop-offs where the driver's badge identifies the partner.
Where is the Instructions Preview in Odoo 20?
On the operation type form, under the Barcode App tab, in Inventory > Configuration > Operation Types. It shows the scan steps an operator will see for that operation and updates when you change the Mandatory Scan, Options and Final Validation settings above it.